Technique Exploration - Closing the Back of a Hoop
Sep 29, 2020
When I first started embroidering, I was hand stitching on canvas - that is, a wooden frame over which I stretched a piece of fabric. I often left the canvas backs open and exposed because these pieces were sturdy and meant to hang on walls and/or be framed to hang on walls. But when I started stitching in hoops, I was much more comfortable closing (and protecting) the back of the fabric - especially since doing so makes it look more tidy to me.
Personal preference, obviously.
I toyed with different ways of closing the back, and ultimately decided on trimming the excess fabric, cinching it closed with a piece of thread, and then covering the remaining hole with a circular piece of felt. It's how I've been closing my hoops for years and now that I'm set in my ways, I doubt I'll ever change.
Human nature, obviously.
If you've ever purchased one of my patterns or kits, a portion of the instructions include my technique for closing my hoops. But if you're just starting with embroidery, or are looking for ways to close your hoop, I will briefly explain it here (illustrations included!)
Here's what you'll need (I've attached links to some of my favorites for some of these):
- Your finished embroidery, still in the hoop
- Embroidery floss, needle, straight pins, and scissors
- A piece of circular felt, cut just smaller than the size of your hoop
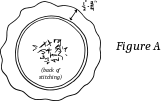
1. Flip to the back of your hoop and trim your fabric. Leave about a half to three-quarters of an inch of fabric all the way around. (See Figure A)
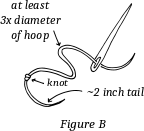
2. Cut a length of embroidery floss that is about three times the diameter of your hoop and thread it through your needle. Make a large knot at the end and leave yourself about two inches of thread (you will use this to tie off at the end). (See Figure B)
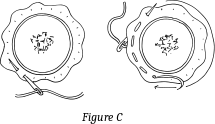
3. Begin a running stitch through the fabric, about a quarter of an inch from the cut edge. Work your way around the fabric until you get back to your starting point. (See Figure C)
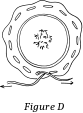
4. Take the thread out of the needle and, holding both ends of the thread pull so that the fabric closes over the back of the hoop. Tie the thread together and make a secure knot. Trim the thread if necessary and tuck any excess inside of the hoop. (See Figure D)

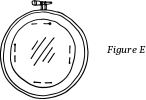
5. For this method, you will need a piece of felt that is just slightly smaller than your hoop. You will be stitching this felt circle over the back of your hoop. Use straight pins to attach the felt circle to the back of your hoop and hold it in place while you stitch. (See Figure E)
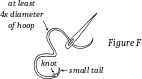
6. Cut a length of embroidery floss that is about four times the diameter of your hoop and thread it through your needle. Make a knot at the end (you do not need to leave much thread after the knot as you will be tucking this in when you are finished). (See Figure F)
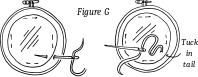
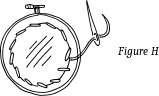
7. Choose a starting point (anywhere will do) and bring your needle up behind the felt (while going through the fabric first) and tuck in the end of the thread. (See Figure G) Repeat this, creating an angled-looking stitch all the way around the felt circle, spreading out the stitches so they are about a half inch apart. (See Figure H)
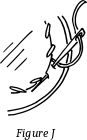
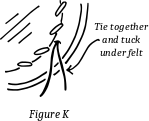
8. Once you have gone all of the way around the circle, put your needle back under and through the fabric (as you have done with the rest of the stitches) but do NOT come back through the felt. (See Figure J) You can then remove the thread from your needle and separate the strands so as to tie a secure knot. (See Figure K)
And you've done it! 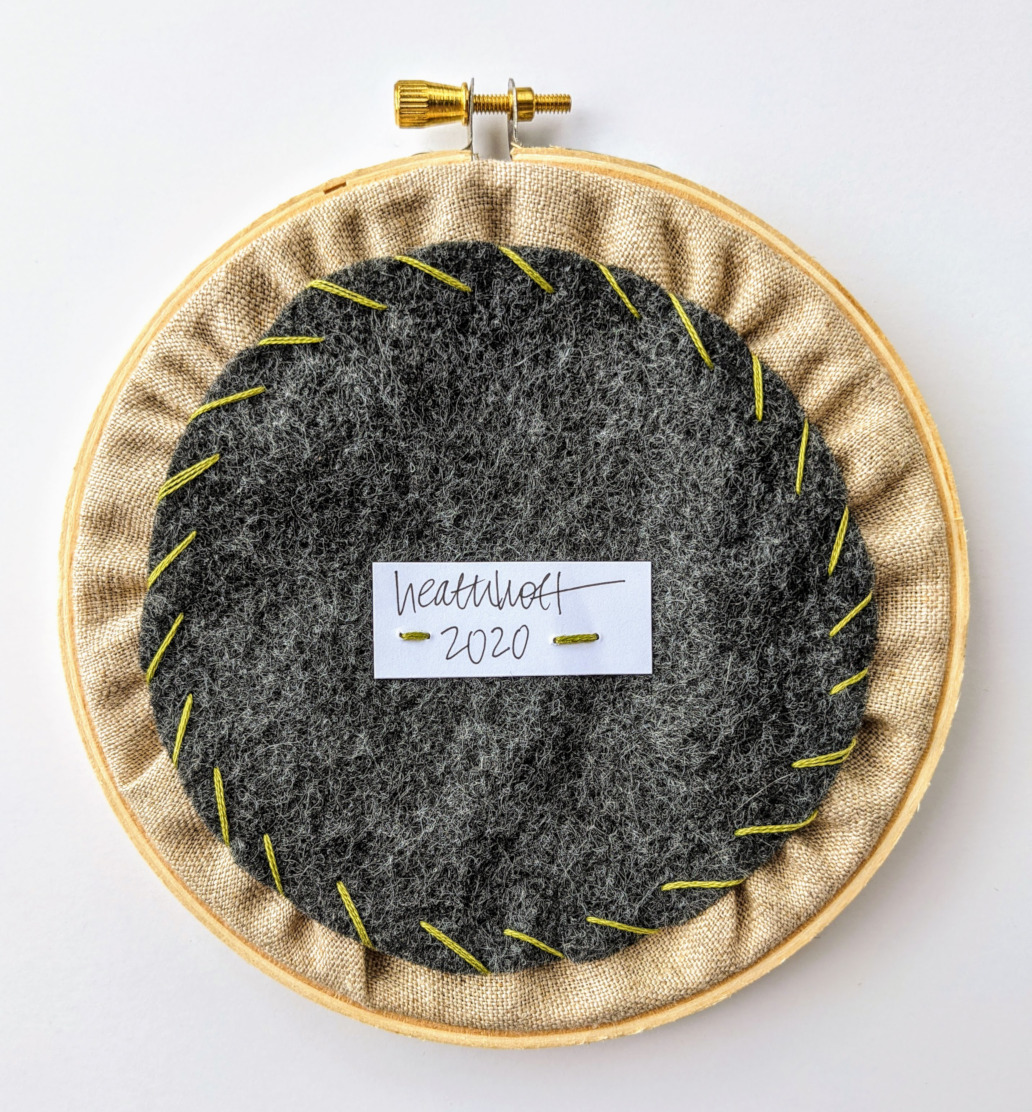
Thanks for checking out my very first Technique Exploration - and I hope you'll come back for the next one!
Cheers!
Heather